

Follow this first steps article to get started with a design on Coursensu. In this article we'll cover enough to get you going and start to see how learning experiences can be designed. This page is available in both video and article format.
Ready? Let's start your first design 🚀

This will launch the new design workflow.


All new designs come with a default Section 1 and a content item - the yellow 'sticky note'. You can replace the placeholder content 'Describe this item' text with the first part of your learning design.

A item submenu appears, offering more options, but it also switches the designer into the 'add new item' mode once you've made this first selection.


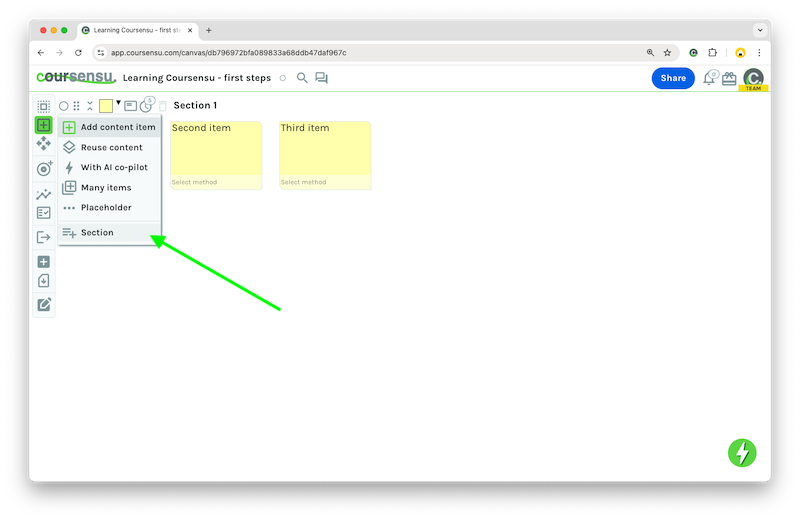
We have called ours "Second item" and "Third item" just to make them obvious for this guide.
Tip: Click or Press anywhere in the large white area to de-select content items (shown here with a green highlight).
That's it - you're adding content items. You can add as many of these as you need, each one to describe part of the learning experience.
Eventually you'll want to get more organised - for this we use Sections. Sections can be Topics, Weeks, Authors, Menu areas or more. Use them to group content items in a way that suits your needs.

Selecting the Item menu will also show the Item submenu - five new icons to help you add and organise content items.
Note: Each new section can also come with a new content item. The first step with a new section is to change the default 'Section' name to something more meaningful.

Tip: You can change the colour of any section and any content items. Use colour as a design tool, such as type of content / activity, topic covered, highlights to discuss with a colleague (for example).
You now have content items, grouped into sections - but we can do more for our first steps. Let's add some richer definition to our learning experience with more detail.
Each time you add or edit a content item, you can also add more detail to define the learning experience. This part of your workflow will go beyond adding content and topic ideas, it'll help to create a visual representation of the whole learning experience you are designing for.
For first steps, we'll explore the fundamentals - let's hep learners get to know each other by setting our first item as an introductory discussion.

Note the additional toolbar that appears at the top of the selected item.
Tip: If you have selected more than one item, it'll inform you in this toolbar. Select anywhere in the big white space to remove the bulk items selection.
There are hundreds of pre-defined teaching, learning and assessment methods for you to select from. Or, you can type anything in here if you want to define your own exact learning experience.


Tip: if you want to learn more about any learning method simply click the 'New window' button and it'll open it in the Learning Methods Explorer (in a new tab).


Tip: The type is your choice from a selection that helps to filter all the possible active learning options available to you. There are six standard types and some alternatives - all based on established learning science and common methods. They can help you make design decisions - choosing an option will filter the Learning methods and feeds the data-driven insights, to give you design tips and recommendations. It's optional, but a powerful tool for learning design (see our Research page for more information).

Duration is your choice. It will help you map the overall experience against the time required for learners - so when you select an option consider how long you expect learners to engage with this activity. Duration will also likely include how long it'll take an educator to set up or support a task, as well as the duration of any media or interactions you're planning to use. It's OK to guess and it can be revised at any stage.
Tip: Duration feeds into your data-driven design insights and will help you make more informed design decisions.

You can now see, when hovering over the content item, that you have set up a 5 minute Introductory Discussion. Defining the experience is the basis of ensuring that your design ideas will transfer into an impactful learning experience.


