This article covers how to add others to your designs and work together. There are different methods with your choice in roles and permissions based on whether you want them to change things, or just review or add comments. Working together on designs unlocks real-time editing and collaborative features, including a live, real-time view of who's currently editing items within any shared design space.
Share your design - a quick and simple way to add users to your design.
Add users when creating a design - start a new design with your team.
Add users to any existing design - add others to an existing design.
Viewing live collaborators - know exactly where your teammates are contributing.
Ready? Let's work together 👏
You can invite anyone with a shared link, this permits access to Review and Comment on your design. You can also invite team members to collaborate on your selected design or invite new team members.


Tip: Anyone with this link can access your design but it can be revoked by anyone with permission to select the Revoke shared link button
Viewing a shared design as a visitor account

Start: Navigate to 'My designs' area and select a design you wish to add collaborators.


This loads the extra details screen for your design, it contains spaces to add more details to your design, as well as space to add additional team members, and select their role (such as editor, comment or review)

Note: Pro accounts can be added as Review & Comment or Editor. Expert accounts can only be added as 'Review & Comment')


The examples above show both options - Edit and Review & Comment.
Note: If you have added all available team members, or there are no other members of your organisation, you will not be able to add more people into your design. You will be prompted to invite them, if this happens.

Result: Once you have added others to your design you'll be able to see them listed in the 'My designs' area for each design as icons.

Tip: You can hover over an icon to see their name (if they have not added a profile icon).
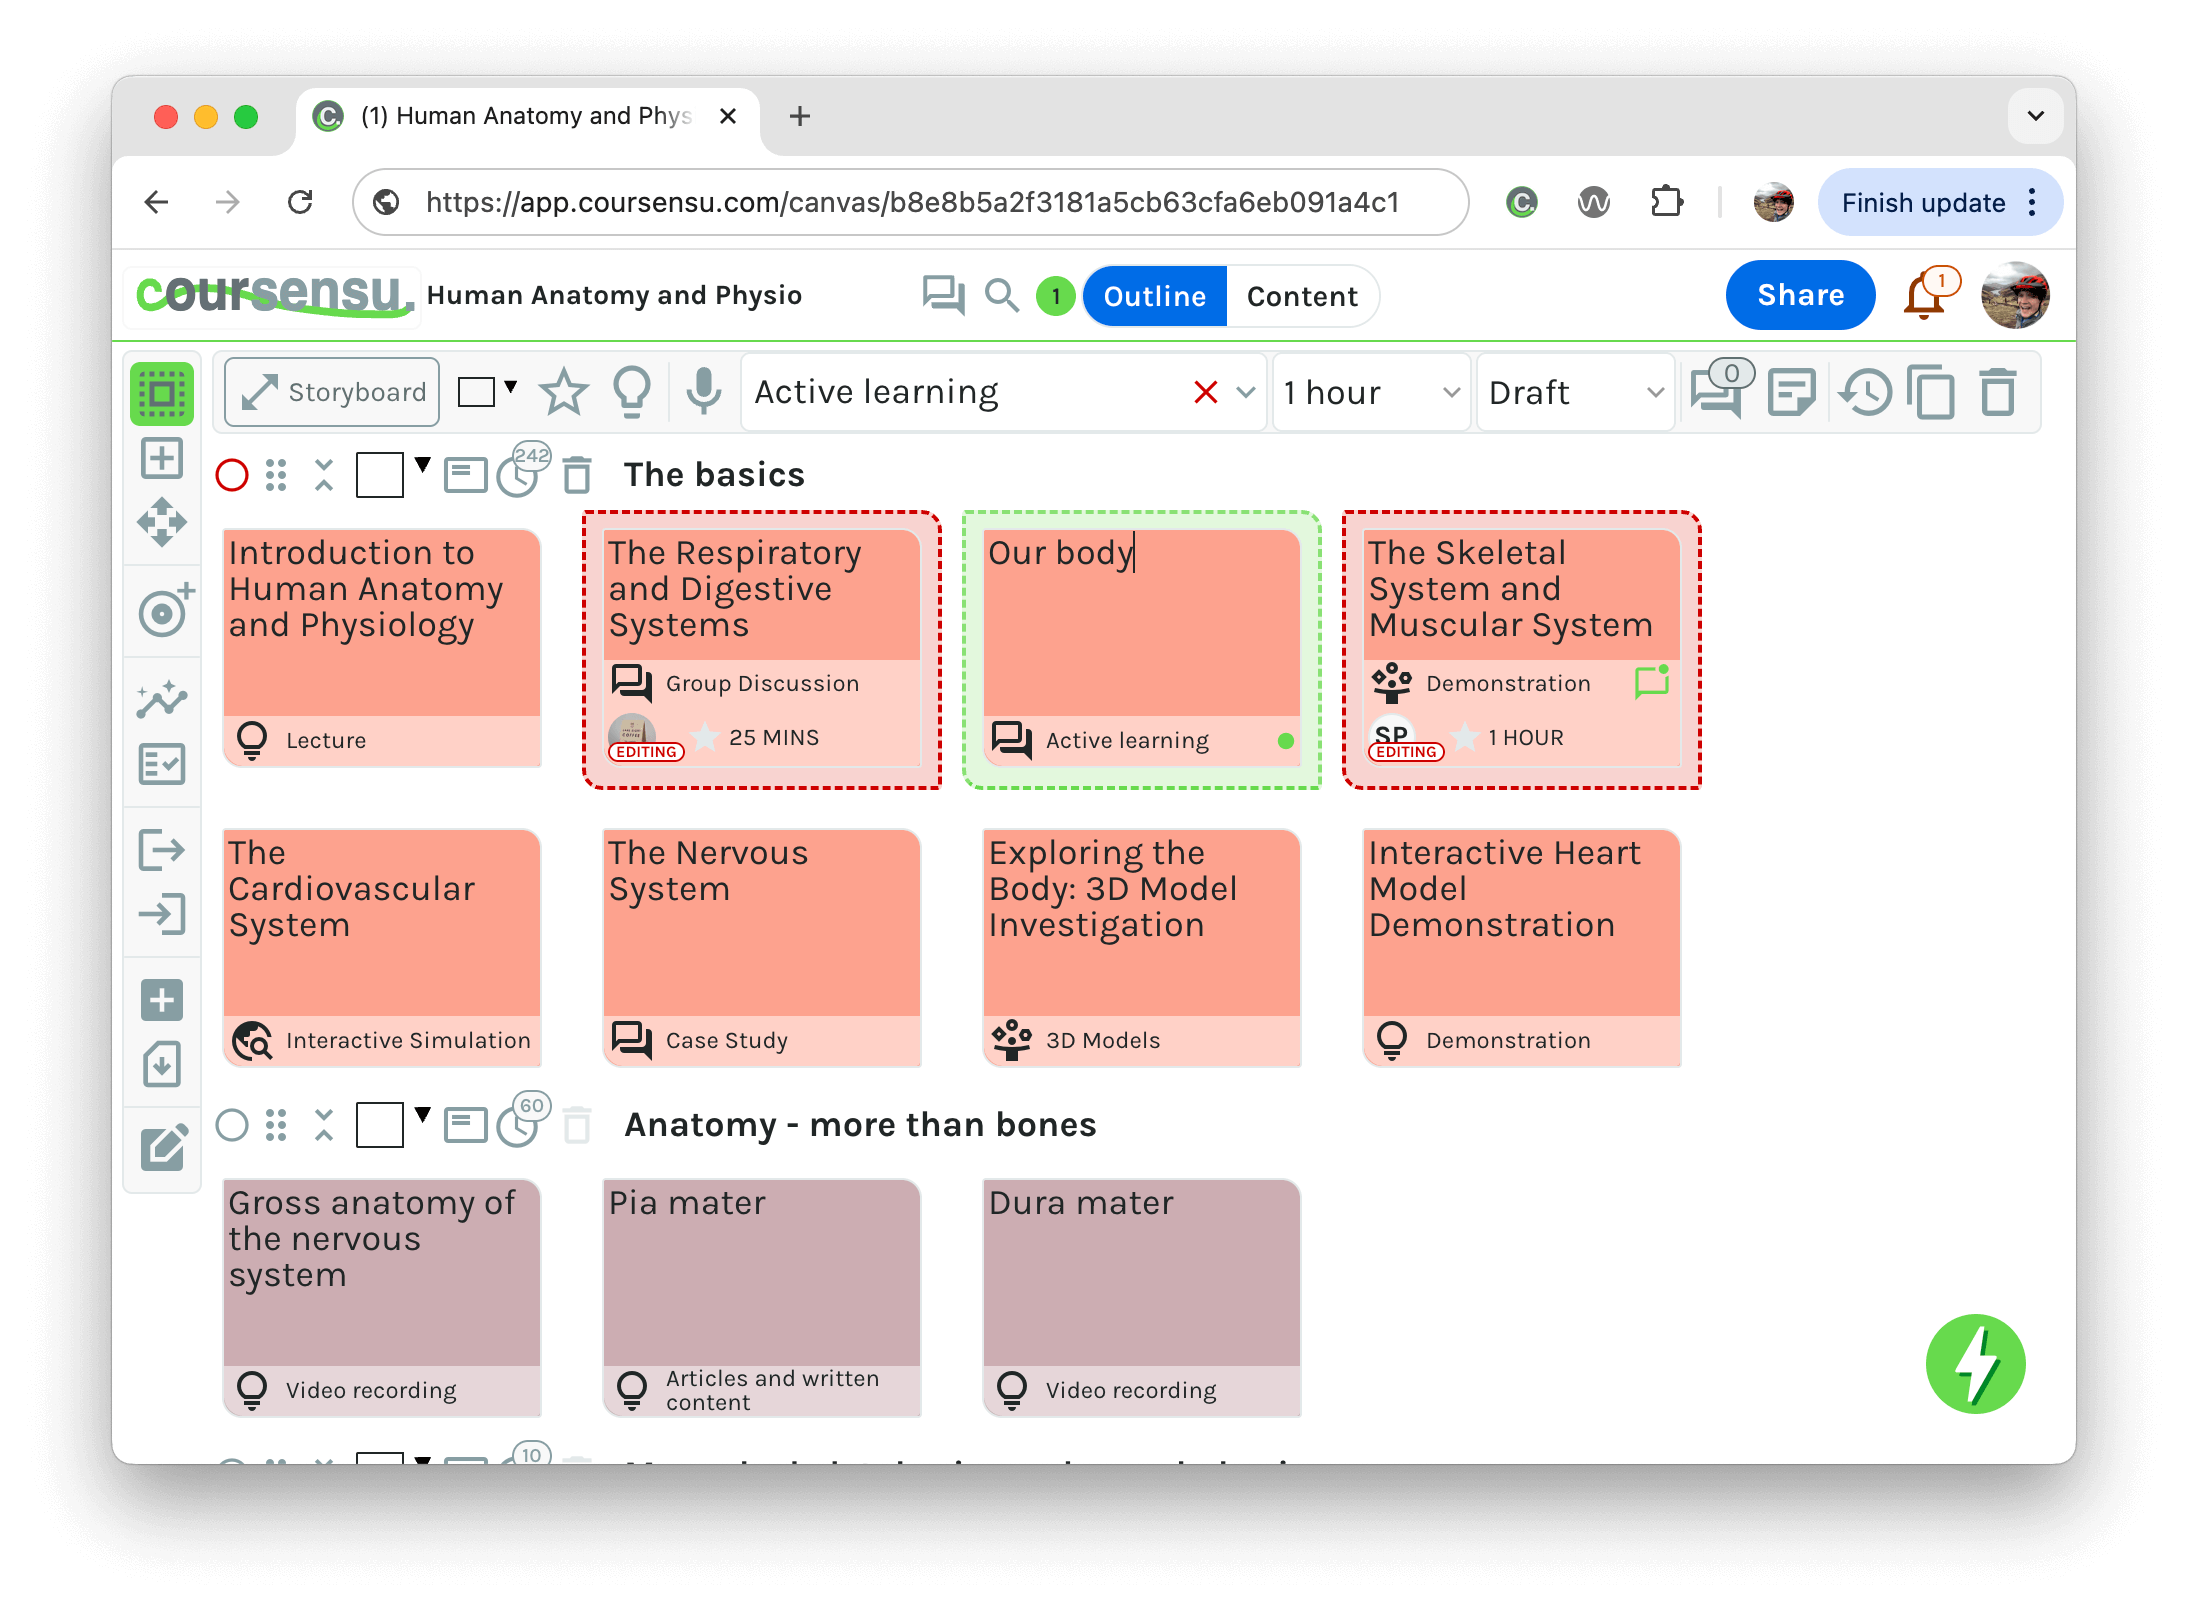
When you have added others into your design, and they are online and in the same space, Coursensu will show you which item they are working in. This is a live feed, so as they navigate to different items you'll be able to see where they are contributing. This is to prevent anyone overwriting each other, and to ensure maximum transparency with where colleagues are contributing.

Edited items are marked in red, with the current editor noted in the item. Items being edited by others become view-only until the other editor has moved onto another item, or finished making their changes.